Video Transcript
IntroductionIt's a glorious day here at Cabinet Joint. I'm Justin. In today's video, I'm going to be showing you how to build a paper towel cabinet. Now, essentially what this does is it allows you to take your paper towel off your countertop and put it accessibly into a cabinet like you see here. Now, this is also a drawer, so you can go ahead and open this up. There's more storage in the back, so you can put trash bags or more paper towel rolls—things like that—back there.
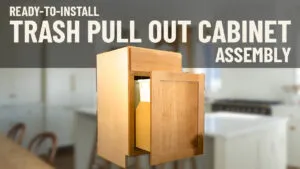
Now, it's also worth mentioning in this video, we're only going to be talking about the top portion right here—talking about the drawer in the cabinet and how to build that. The bottom can be whatever you want it to be. This customer has a trash pullout, which is a great option. You can also do more drawers down here, or you can do a door if you'd like. The top here is really what we're going to be looking at today.
This is a fully custom cabinet; you're not going to find this in our catalog. But you are able to reach out to your cabinet coach, and maybe this is the right option for you. Just a reminder, we are only talking about the actual paper towel drawer here, so if you have any questions about any of the other parts of the build, we have video links in the description that you can reference to see how we got to this point.
So now, let's look at the tools and supplies that you're going to need.
Tools, Supplies, & PrepYou're going to need your speed square, pencil, and tape measure. You'll also need a 3/4-inch Forstner bit (or any 3/4-inch drill bit), some blue tape, an impact with your T15 bit for your cabinet screws, a drill with an 1/8-inch drill bit, and a jigsaw with a good blade. Additionally, you'll need a 3/4-inch dowel. You can substitute a 3/4-inch dowel with a 3/4-inch copper pipe or something similar—this will be used to actually hang the paper towel roll. You can also supply yourself with an aftermarket paper towel holder. Lastly, you'll need the paper towels.
Now, looking over here at the cabinet, at this point in the build, it is exactly the same as it would be for your typical inset job. We have our drawers and everything installed, and, like I said, it's all the same steps that you would follow except we stopped here at installing your drawer front. On the bottom of this cabinet, we actually have a bottom-mount trash pullout. This is a great design and a great use of space. We have a separate video on how to install that.
If you notice, this cabinet looks a little bit different. There's no top rail here, and our drawer front has a big hole in it. That is because we are going to be installing this drawer front and actually cutting out part of the drawer box in order to have that opening. The countertop will sit right on top of here, so there's just no need for that upper top rail.
Now, let's get into making it a paper towel cabinet.
Paper Towel Cabinet AssemblyThe first step, as we have our drawer installed in the cabinet here, is to tape the front and back of the front of the drawer box. That way, when we go to cut it out, the tape will help prevent the wood from splintering. Because it’s hardwood and because you're using a jigsaw, there's a good possibility that the wood will splinter. We can avoid that by putting this tape.
Once we have it taped, we can go ahead and temporarily place our drawer front. We are going to create even spacing using these 3/32-inch spacers that we have here. If you don't have 3/32-inch spacers, you can just go ahead and use shims to get even spacing all the way around like any other inset drawer box.
Once you have it set in place, you're going to want to mark the inside of that opening on your drawer front. This will be your line to show you where to cut. Once you have it marked out, you can take that drawer front off and extend the line up to the top of the front of the drawer box because we are going to cut out almost all of the front of that drawer box.
Now we can go ahead and cut. I'm going to place the drawer box vertically and use clamps to hold it down while I cut. I'm going to start with both of the sides. You’ll want to use a good jigsaw blade because otherwise, it can cause more splintering than necessary. Also, be mindful that you may hit staples that attach the bottom of the drawer box to the front of the box. Your jigsaw will go through them, but it won't like it, so make sure you have some extra blades in case you need them.
Once the cut is done, I'm going to sand it out to remove any burn marks left from my blade. I’ll also make sure that everything fits nicely and that there are no massive waves or imperfections that will catch the eye. Now that we've cut out the front of our drawer box, we can attach our drawer front to the box itself.
You're going to measure half an inch from the bottom of the front, place your drawer box on that mark, and ensure even spacing on either side. This step is similar to mounting any other drawer front to a drawer box. Then, drill in all four corners and use a 1 1/4-inch cabinet screw to fasten the front to the box. Make sure you pre-drill and don't over-torque the screws because this is a delicate piece of wood, especially after removing most of its structure.
Now we’ll put the drawer back into the cabinet and check that everything looks good and the spacing is even. From there, we can make any necessary adjustments using the Blum undermount clip, adjusting side to side or up and down for a perfect fit.
Now that we like the fit, it's time to install the dowel that will hold our paper towels. We’ll remove the drawer from the cabinet and measure to drill our holes for the dowel. Measure 3 5/8 inches from the bottom of the drawer and 2 1/8 inches from the front of the drawer. These measurements may vary depending on the size of your paper towel rolls, but the goal is to have the roll floating so it spins freely without friction.
Transfer the mark to the outside of the drawer box and drill from the outside for a cleaner cut. Then, finish drilling from the inside. Now we can test the fit of our dowel, making adjustments if necessary. Once the dowel fits well, we can cut it to length using a miter saw and install it in the drawer.
The Finished Product & SummaryNow, I’ll reinstall the drawer into the cabinet. Imagine there is a countertop above. You won’t be able to install the paper towel roll from the top, so you’ll pull out the drawer, push in the dowel, remove the old roll, insert a new one, and push the dowel back into place. Now you have a fully functional paper towel cabinet with extra storage space in the back.
This is a really cool cabinet that this customer is getting, especially with the bottom-mount trash pullout. It’s a great configuration with lots of accessibility and options. The biggest things to remember are to ensure accurate measurements that fit your paper towel roll and to cut carefully because you only have one chance with the drawer box. If you cut too much or too little, you’ll run into issues later.
If you have any questions, feel free to reach out to your cabinet coach or call us at 888-211-6482. Thank you for watching the video. Have a great day!