Video Transcript
Introduction
Hey, everybody! Brian from The Cabinet Joint here at our shop in Gettysburg, and the purpose of this video today is to talk. It’s kind of a soup-to-nuts, all-encompassing video on how to install the Blum Tandem hardware into an inset or overlay drawer box. In the past, our videos have been broken up, where we have one video that shows you how to put some orange clips in and another video that shows you how to do this.
This is going to be when you're putting drawer boxes in a cabinet—this covers everything: front frame prep, how to install the glide, how to install the orange clips, and what to do if you don’t have pocket holes or pilot holes in the back of the cabinet. We’re going to cover it all, so stay tuned with us, and let’s get started.
Tools & Supplies
Before we show you how these glides actually install, let’s talk tools and supplies. You’re going to need a couple of drills or drill bits. I’ve got a Phillips head for certain screws. There’s one that takes a square bit or a Phillips—you can use square if you want, and we’ll talk about that.
I’ve got a pre-drill, like a self-centering bit—you can buy those at Lowe’s. I’ve got a 1/16-inch drill bit, a tape measure, a marking pencil—just basic stuff. For some operations, if you’re not using the rear mounting brackets (we’ll talk about this), you might need a level, so a little torpedo level is really great to have.
Some scrap 3/4-inch plywood may come in handy for certain operations that may affect you or may not. So, everything I’m saying may not affect your install. Then you have the actual stuff that comes from us with the cabinets themselves: the rear brackets for the glide, the glide body itself, the Tenn-Tex bracket for inset, the orange clips (or whatever kind of clips you’re using—there are a couple of different options we’ll show you), and your various screws that came with the hardware packs as well.
That’s about it. You may run into a strange tool you need or whatever, but this is going to cover you for most of what we’re doing here.
Preparation & Nuances
Before I get started on actually showing you anything, I want to give you the lay of the land about what we’re talking about. To preface all of this, I want to say that one of the biggest questions we get asked is: how difficult are these cabinets to assemble?
Well, assembly is a broad term. It encompasses actually building the plywood box, putting the front frame on, and what have you. But it also includes hardware: putting hinges on for doors and putting drawer tracks in for your drawer boxes.
That is probably the more difficult—well, I wouldn’t even call it difficult—but it’s the more nuanced of the operations. Once you’ve built one or two of the plywood boxes, they’re all variations on a theme. This inset drawer glide installation is where a lot of our questions come up.
So, I want you to pay careful attention as I walk through it. I also want you to understand: some of this is very intuitive, and you can skip over to different chapters to get what you need. Some of it’s not intuitive, and you’ll want to watch it a couple of times.
I’m going to try to cover everything that relates to installing a drawer box into a cabinet.
Installing Angle Brackets on Your Cabinet Back - 15”-24” Cabinets
Prior to assembly, you’re going to lay your cabinet back on the ground. Here’s my top and bottom doos, and you’re going to have, in this case, a three-drawer base. I’ve got three sets of pilot holes on each side, so I need six brackets.
These brackets are only for 15 through 24-deep cabinets. You won’t use these if it’s a 27 or 28-deep or a 12-inch deep cabinet. I’m just going to put one on to show you how this works, but you’ll want to look at your cabinet to determine your pilot holes.
I want to stress—very important you understand this—we sell a variety of cabinets: base three-drawer, base three-drawer equal height. If you are just talking about wanting a 16½-inch one versus an 18-inch one, that is not what we consider customization.
Your pilot holes will be marked for you to put your brackets on. What I’m talking about is if you and your cabinet coach say, “You know what? I want to build a dresser, and I want it 48 inches high, and I want it to have five drawers,” and your cabinet coach constructs a five-opening front frame for you and a case-only cabinet to strap it on—there are no pilot holes on the back.
You’re going to have to locate those yourself. If that’s what you’re running up against right now, you’re going to want to go to the video below in the description. It talks about how to locate those using your front frame as a template or using hand measurements. Very easy to do, but that will walk you through how to locate your own locations for these brackets.
If the cabinet is standard—which is what we’re going to base our premise on—98% of the cabinets are standard. I’m just going to show you this base three-drawer. So, I have six of these brackets, two per set of drawer glides, two per drawer box. There’s a series of holes in the back.
Blum, in their infinite wisdom, allows there to be some float at the back, and you want to leave that alone. Once the drawer box is in, it will naturally center itself and operate smoothly. This is one of the key features of the Blum Tandem system that makes it so reliable and user-friendly.
Now, let’s move on to the next step. We’ve installed our drawer glides for the inset cabinet, and everything is in place. Make sure you double-check all screws for tightness and ensure that the brackets and glides are securely installed before proceeding. Any loose components can cause issues with drawer alignment and smooth operation down the road.
Installing Drawer Glides in Cabinets Over 24” or Under 15” - Plywood Blocking (Inset & Overlay)
That’s perfect. So now let's go to the 27 deep again. Whether you have inset or overlay, inset I’ve got these brackets, overlay I don’t. What’s critical here is if I take my drawer track, I put it in the cabinet—no rear bracket—I put it in the cabinet, I can make my connection here, but now my glide is just slopping around in the back. How do I lock that in place? This is where these pieces of plywood come in handy.
Now I must stress, if the cabinet is a standard cabinet, Koga is going to send these 3/4" thick blocking plates for you, okay? They're about 6" wide, they’re the right height. You stand them up in the back of the cabinet, and it will capture all three drawer glides because it’s standing upright. This is a custom box. This is one where one of our cabinet coaches designed using a case-only cabinet. This is going to be a warming drawer down here, and I’ve got this center partition, so we have to supply our own 3/4" thick plywood.
I’ve cut a piece here just to show you. The main thing you have to understand—whether you're inset or overlay—is irrelevant. You want the block to span both sets of holes if possible. That might mean you have to run it horizontally, or you can run it vertically and try to catch them both if you can—whatever it takes to get this flushed out with that so your track runs straight and you've got enough screws in to make yourself comfortable that it will hold the weight you’re going to put in that drawer box.
Okay, I screwed this in. I just used some larger screws that have a big head on them to hold it in well. Use whatever you want to mount this block, just make sure you don’t use something so big that it pokes through a finish side. Once it’s locked in place, this 3/4" thickness will flush out with my front frame here. So now all I’ve got to do is put my drawer glide in.
Same operation: grab my machine screw, second hole back, find the front of my little elongated hole, screw this in place, and now it won’t move. And now I have this rear set of holes, and I can screw into that screw hole there into this piece of plywood, and I am running perfectly parallel because I’m 3/4" here and I’m 3/4" there.
I can do the same thing for my second track. The only difference is when I do this one up here, I don’t have a level cabinet floor to work with. So I’ve got to attach it here, then put a level on my drawer glide, and once it’s level, I can make my attachment point back here. Otherwise, it’s just going to be sagging. So you want to get the drawer glide level, and you can use a torpedo level up there, a two-foot level—whatever you’ve got. You just want to make sure it’s running level before you lock it to the cabinet wall.
All right, so I’m going to go ahead and install this, come back, and show you the finished product so you can see what it looks like. So I've got my bottom track in so that Glide is ready to go. This one, I placed it in, set it where I want, and screwed it in real good. Right now, it's just floating here—I can move it up and down. So I threw my torpedo level on here, waited until I got it level. I'm level, so I'm going to find a hole in the back, run that in there, take it right to level off. I'm going to do one more just to be sure because these 27-deep Glides or drawer boxes might have a lot of weight in them. I'm going to do that row of holes too.
Now I've got three attachment points—one, two, three—on this drawer Glide that's suspended in space. So now these Glides are ready to go. If I do the same thing on the other side, we can put drawer boxes in here.
Installing Drawer Glides in Cabinets - Overlay
Overlay, because the drawer box is now sitting out flush with the front frame, and the drawer front is attached to that, the drawer Glide can be carried by this horizontal rail. You can see I have it set up there. On inset, we're back in here because my drawer box is behind the front frame or flush with the back of the front frame. On overlay, the Glide will sit out here and rest on this, so there's no need to worry about carrier brackets or any of that.
Now I'm going to switch over here, working on this middle opening. I take the tail of my drawer Glide. On 15- through 24-deep cabinets, you're going to have a little tail on the drawer Glide, and that goes on the T—very intuitive. There's a T slot in the back, and you have that track. Just run it between, and now the drawer Glide can slide forward and backward, but its weight is carried by that rear bracket.
The drawer Glide can be carried by this horizontal rail, so you can see I have it set up there. The critical part of this is how far back my drawer Glide gets set from the front of the front frame, and that dimension is 5/32 of an inch. Now, a lot of tape measures don't read 5/32; they only go to 1/16. What we like to do is take a little piece of quarter-inch plywood, rip a piece that's 5/32 (or if your tape measure goes to 1/16, go to 3/16, then half of one mark back—so you're at 2 and 1/2 of 1/16), make a piece of wood like that, and glue it together. Just make an L, and all we do is, as we're going through—we take the little gauge we made and pull the Glide up behind it. We go down and do that to all the Glides, pull them up behind, and now we can run our screw.
The critical thing is, when I put this on, I want to be 5/32 behind the face of the front frame, and that'll be perfect. Once I do that, I'm going to grab—this is very critical—you want to have a self-centering drill bit. You can buy these at Lowe's for about seven bucks. I think we even have them in our tools and supply shopping page. You're going to take this and put it in the top hole, just because it's easier for the drill bit. If you get to the bottom one, the drill is kind of cocked. I like to use the top one. You're going to drill a hole there, and that's going to center the hole. That little collar will make sure that the screw hole is dead center so that when you put the screw in, it doesn't move the drawer Glide forward or aft.
Now I can take this screw—that head has to be large enough to stay in that hole and not have the Glide pop off—I can run the screw in, and now that Glide is tight. I'm not going to do that on this cabinet because this is a customer's cabinet, and it's inset. I don't want to have a hole in their front frame, but putting the screw in is the easiest part—you don't need to watch me do that on video.
So again, the critical thing is 5/32 back. Make yourself a little jig if you have more than a couple of cabinets; otherwise, it's kind of a pain to run through and measure all these setbacks.
That's it—you're still using the same exact bracket in the back if it had one, or in the case we had over there, if there's plywood carrying it, that's all the same. But you don't want to lock that plywood on, if you're using that plywood method, until you have your setback here correct. Now I can go and drill into the cabinet wall using that plywood blocker.
Installing the Drawer Boxes
Okay guys, we're in the home stretch here. The last part of this operation is to put the drawer Glide release brackets onto the bottom of the drawer box. Then, we're going to go ahead and put this into the cabinet and show you how to latch it in. Our final segment of this video will be how to adjust all this so you can get your drawer box dialed in.
So, remember there are three types of Clips. These are our standard ones—they're going to represent 95% of what you do—or these two. If you have deep cabinets, 27- or 30-inch-deep cabinets, you're going to get these funny-looking momento ones, a little bit different looking than those. And then, if you have really narrow drawers or a trash can pullout that uses the Blum Tandem, you're going to have these narrow release clips, so they don’t collide in the middle here.
These two versions install pretty much the same way. Your drawer boxes should come already pre-drilled, right there and there, to receive screws in these two holes—here and here—or, in this case, here and here. So, I run this up into the corner. We want that gray part against the corner—not like that, but like this. Same there. Then, we're just going to take the small screws that came with your hardware pack. Remember the big drawer track bag with the angle brackets in it and the orange release handles? A little bag of hardware—you want some of the small screws. We're going to run those in here: one, two, three, four. Let me grab some of those screws, and we'll make that operation happen.
Okay, so here's the two holes I’m looking for. Slide that up, and you'll see those two holes match up: one, two. Okay, for my 27- and 30-inch-deep cabinets, it’s the exact same. Push it in, two holes, and screw that in. I'm going to put this bracket over here because that's the one that goes with this drawer.
But the last one is this little guy here—it’s the narrow one. I'm not going to install it because this is not, again, a customer's job. I don’t want to make errant holes. But the gray adjuster goes against the wall, and instead of having these two holes, we have this little L-shaped plate with two holes—holes here. So, I run it in, run it forward, lift it up so that that little plate goes over my drawer box. Then I would grab a little 1/16-inch drill, pre-mark those two holes right there, and drill into the wood because I don’t want to split it. So, I would drill into the wood about a half-inch. Wherever those holes are, I use two little screws—little flathead screws, again, the small ones you use here. I would screw them in there to hold that in place.
This is the same kind of release. You kind of squeeze that to release it instead of squeezing that, but it’s the same basic Blum piece. It allows it to get narrower so that I can fit two of these in a very narrow drawer box. These are fairly rare, but you will use them on, again, those trash pullouts or very narrow drawer boxes.
I'm going to go ahead and mount the one that actually goes with this drawer box in, and then we're going to get this cabinet back up here and show you how these drawers install.
Okay, I've got my orange release brackets on the back. This is going to be a very fast section of this video. You lay it up there—very careful not to bang your front frame—lay it up there and push till it clicks. Now, my drawer didn’t go all the way in. Now the drawer goes in sweet as you please and soft closes.
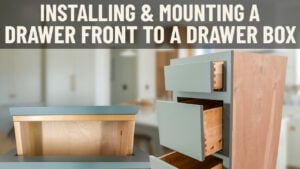
Now I'm going to go ahead—separate video—we show you how to actually put your drawer fronts on. I'm not going to show you that now. But I’m going to bring a cabinet up here that already has the inset drawer Glides or drawer boxes and fronts on, and I want to show you how to adjust the drawer box up and down, left and right, or tilt it if you have to. There are three-way (you can call it six-way if you want) adjustments on the drawer box itself so you can dial in—especially on inset—you can dial in your gaps.
Adjusting & Centering the Drawer Boxes
Everybody, we're at our final step. We've got this three-drawer base fitted up, and you should be able to clearly see in the video. So, I have this really large gap up here, but the drawer front is sitting on the front frame down here. This is really critical with inset, but even with overlay, it’s helpful. How do you dial that out? Maybe you didn’t put the drawer front on quite straight or whatever.
Blum has built into these devices left-right adjustability, up-down adjustability, and if the drawer box is sitting like this—or back or whatever—you can actually tilt the drawer box forward or aft with an adjuster on the back of the track.
How this works is: if you want to do left to right, each of these handles located up underneath has one of these little wheels on it. If you spin the wheel, there’s probably about a quarter of an inch of adjustability in there to go left or right. You also have up-down. This little lever right here—if I push it, so if this was up underneath the drawer like that—I would push it away from me to raise the drawer, and pulling it all the way back in lowers the drawer to its lowest point. I’m going to show you how all this works live on the cabinet in a moment.
Then the last adjustment is on the back of the track. There’s a little gray lever right here, and if I do that all the way to one side—you might be able to see it—but hold it this way. If you watch that hook, it’ll go up or down. Here it’s down, and there it’s up. That little hook is going into the back of the drawer. So, as I do something with that, it’s raising or lowering the drawer as it sits on this track. If I raise the back, it’s going to tilt the front of the drawer out. If I lower it all the way down, it’s going to tilt it back, or you can dial it in anywhere in between.
Any adjustments outside of that—remember, you have the fore/aft adjustment on the inset with that Tentex bracket located on the inside of the front frame. Loosen up that set screw, and the whole track will slide back into the cabinet. So, if you’re protruding right here, or you want to bring the drawer front out, you can loosen up the two Tentex brackets and drag the whole slide mechanism forward because it’s sliding on those teeth at the back—that T-junction with the bracket at the back. It’s sliding on that.
If you’ve locked the Glides to the cabinet wall with that plywood because you’re doing a 27-deep or a 12-inch-deep drawer, you’re going to have to remove that screw and relocate it—or maybe you use one of the elongated holes on the track. If you use one of these elongated holes here—you can see it—there’s one in here. If you use those elongated holes, you have a little bit of movement to move the slide forward and backward.
That’s the last operation: making sure you’re in and out properly. With overlay, it’s not nearly as critical because you have a rubber bumper there, and that one usually doesn’t fight us as much. But you definitely may have to move the in and out with the inset.
Let me show you how this works. Again, I’ve got this really big gap here. Now, we’re going to open this drawer up. What I’m going to do first is push that lever underneath that I showed you a moment ago, and you can see now I’ve got it dialed in with the top and bottom gaps nearly perfect. If you look at the left side gap, it’s almost touching. The right side gap is really wide, so now I’m going to reach underneath—going to stand in front of the camera here real quick—and I’m going to spin these the proper way.
Final Adjustments and Dialing It In
So, I’ve got this top drawer pretty well dialed in. You can see how the gaps are even now. I used the left-to-right adjustment wheels underneath the drawer. Turning the wheel clockwise moves the drawer to the right, and counterclockwise moves it to the left. It’s really simple.
Let’s move on to the middle drawer. The front edge of the drawer is tilted outward slightly, so I need to adjust the tilt at the back of the track. This is where that gray lever on the back comes into play. By turning it upward, I raise the back of the drawer track, which brings the front edge of the drawer closer to the face frame. If I lower it, the front tilts away. You just tweak it a bit, close the drawer, and check the alignment.
Now for the bottom drawer. This one has a slightly uneven gap at the top compared to the sides. For this, I’ll use the up-and-down adjustment lever underneath. Pulling it back lowers the drawer, and pushing it forward raises it. You can also fine-tune the gaps by combining these adjustments with the left-to-right wheels.
Once all three drawers are adjusted, take a step back and look at the cabinet as a whole. Check for consistent gaps between the drawers and around the edges. If you’re working with inset drawers, the gaps should be uniform on all four sides. For overlay drawers, make sure the drawer fronts sit flush and the gaps are even.
A Few Pro Tips
Check Soft Close Functionality: Before you call it done, test the soft-close feature on all the drawers. Open and close them a few times to ensure they glide smoothly and close softly without resistance.
Secure the Drawer Tracks: If you’ve made significant adjustments to the tracks, double-check that they’re secure. Tighten any screws you might have loosened during the process.
Test Load Capacity: Load the drawers with some weight to make sure they operate smoothly under pressure. This is especially important for heavier drawers, like those designed for pots and pans or trash pullouts.
Final Touches: If you’re working with a painted or stained finish, touch up any scuffs or scratches caused during installation. Use a matching paint or wood finish to keep everything looking pristine.
And there you have it! Your drawers are now installed, adjusted, and ready for use. It’s a bit of a process, but once you get the hang of it, you’ll find it becomes second nature. Blum Tandem Glides are designed to make your life easier with their smooth operation and adjustability, so take full advantage of those features.
Let me know if you need any clarifications or if you'd like a summary!


Awesome video!
Great videos
Very helpful
Excellent!! You covered every question I had or might have.
Summer 2019 order has Blum drawer slides but no pan head screws. All screws are now shipping as stove head. They still seem to work adequately for both the brackets to the cabinet and the orange release handles.
since that video was shot, they have redesigned things so the drawer box does not rub the new stove head screws.
Something I ran into with the prep false door option is that the pilot holes for the glide bracket are too far in to match the distance from the side panel to the inside of the front frame drawer opening. So the bracket needs to be mounted flush (rather than the standard 1/2 inch gap) to the cabinet side with the false door for the glide to be straight.
Hey Chris, Thanks for your comment. You are correct. When using the Prep False Door cabinet option, the cabinet side is moved toward the interior of the cabinet by about 1/2″ (to provide enough space on the side to accept a 3/4″ thick panel and still hide behind the 1-1/2″ face frame stile). The Blum Tandem glides have an ‘L’ shaped glide carriage and it can be secured to the cabinet side using one of the many available screw holes. Have a great day!
I can’t find instructions when holes aren’t drilled!
Hey Sheri, We do address this at mark-15:45 in the video. Thanks for your comment – have a great day!
Thanks for the help in this video. As a suggestion, It would be nice to have instructions on how to mark holes when there are not pilot holes, but BEFORE the cabinet is assembled. Is that 3/4” from the side if the back panel? Placing the brackets in the back before assembly is super nice. In fact, I think you should advise people to do that. It is far better than doing it after the cabinet is ass,emblems, even better than putting it in its back.
I had 2 cabinets with 4 drawers – 2 equal height and 2 side by side on the top row. There were no pilot holes, even though this is one of the standard cabinets. I had to wait until the cabinet was assembled to mark the 1/2” from the sides. But instructions on how to measure for the guides in the middle of the cabinet would be SO helpful. It took me close or an hour to figure out how to get it right. Is there some distance from the center line, or some other calf that you advise? Please add this to the video. Thanks.
Tip: Lay the front frame on the cabinet back. They are the same size. The bracket sits level with the front frame, so mark the bottom and outer edge of each frame opening that gets a drawer with a light pencil line (left side pencil mark will look like an “L”, right side pencil mark will look like a backwards “L”). Remove the frame. Since the face frame hangs past the cabinet interior side by 3/4″, we know that the bracket needs to sit 1/4-3/8″ inside the vertical pencil line and level with the bottom pencil line (I would favor the 3/8″ as we have always felt that the dimension Conestoga gives for the bracket placement is too far inward from the cabinet wall).
Because we began putting the brackets on before assembly well after than video was shot, we dont reference some of the tips we learn and frankly we are so slammed we do not have time to keep reshooting the videos every time we have an idea. Is what it is! We are hoping in the coming years to reshoot all the videos, but its a massive undertaking.
That is a good solution that I hope will help others in the future.
Hey Brian!
Do all the drawer slides from Blum come with the brackets for the inset drawers or do you have to buy those from a 3rd party vendor?
Hi Mauro,
Please contact your Cabinet Joint sales rep to help with the nuances of inset drawer glide hardware.
We are unable to find your order information to connect you to the right rep. If you have purchased somewhere else we recommend contacting your supplier support. Thanks!
The videos are life savers … You mentioned showing the solution when you order a custom draw orientation there are no pre-drilled holes. I didn’t see that in the video – please let me know the timeline where this is addressed.
The time stamps are below the video https://www.cabinetjoint.com/video-library/blum-tandem-installation-overlay-inset-features-new-pilot-holes/
You mention that custom depth drawers do not use the rear brackets, they attach in a different way, but we are unable to find information on what that is. We have several shallower drawers which did not come with rear brackets and we are wondering how to install them. Any information would be appreciated.
They simply screw to the cabinet wall (3/4″ shim material such as plywood is required if not shipped with your particular cabinet model) using any of the many holes in the slide. There is a video on the web site that shows this…https://www.cabinetjoint.com/video-library/installing-blum-tandem-glides-deep-cabinets-27-30%e2%80%b3-deep/